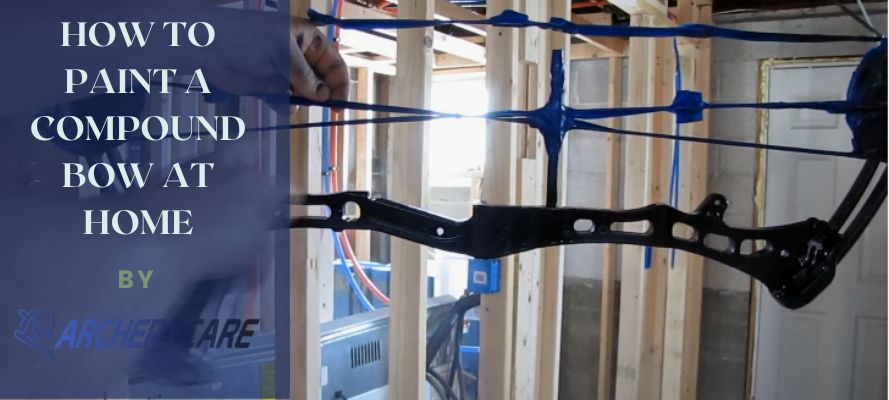
If you’re looking for an easy, inexpensive way to customize your compound bow, consider painting it. It’s not difficult, but a few tricks can help ensure your paint job looks great for years.
You can easily achieve professional results in your home with just a few materials and a little know-how. Here are some pointers on how to paint a compound bow from start to finish. We will also provide tips to help you avoid common mistakes that new painters often make.
Table of Contents
What kind of paint do you use on a compound bow?
Most paints will work, that is if you want cheap camo. But for a high-end compound bow paint, We recommend automotive primer & paint. It’s durable and has more choices for something custom. Other top options are powder coat and duracoat paints.
Tools and materials required for painting compound bow
What you’ll need:
- Automotive primer & paint (Krylon Color Maxx Paint & Primer)
- Paint cleaner/polisher (Meguiar’s Ultimate Compound)
- Clear coat paint
- Painter’s tape (Frog Tape)
- Paper stuffing
- Rubbing alcohol
- Sandpaper or fine-grit sanding sponge
- Microfiber towel
- Drill & Orange CCS Pad
Painting A Compound Bow In 7 Steps
Step 1: Prep Work
Before you start painting your bow, make sure it’s fully disassembled. If you try painting a compound bow while it’s in one piece, you may find that all your hard work ends up splattered across your garage floor.
You also want to do any extra prep work before actually painting; remove sight pins or sights that don’t match your new color scheme. Also, smooth out rough edges with sandpaper or a rotary tool.
Once everything is ready, use masking tape and paper stuffing to cover areas of your bow you don’t want to be painted. It doesn’t have to be perfect—just be sure there are no gaps for the paint to seep through.
It's better to use Frog Tape for the strings and paper stuffing over the cables and cams. You can use whatever masking tape works for you. But what makes Frog Tape better is that it peels off easily once you’re done.
Step 2: Clean Your Bow
Wipe down your bow with rubbing alcohol and a microfiber towel. Avoid touching on the bow after cleaning. This is to avoid leaving the moisture of your fingers on the bow. If not, the first coating will create air bubble moisture that will eventually chip or crack.
Also Check: How To Clean A Compound Bow
Step 3: Apply The First Coat
Hang your bow from your garage ceiling and spray-paint the bow starting with the grooves. Spray lightly to avoid any running spots. Let it air-dry for the time that the manufacturer recommends.
It's better to use Krylon Color Maxx Paint & Primer for compound bow painting. It guarantees no runs or drips and also prevents rust. Plus, it dries in 10 minutes or less.
Step 4: Apply Subsequent Coats
To apply subsequent coats, wait a few minutes between each coat. Wait until you can literally see your reflection in your bow before applying a second coat, and let dry completely between applications.
The time you should allow depends on how many coats you’re applying and how large an area is being painted. Remember that oil-based paints can take up to two days to dry fully when using multiple coats, so be patient!
Step 5: Polishing
Once fully dried and cured, use the paint polisher to remove any little imperfections on the top of the paint. For this, We recommend Meguiar’s Ultimate Compound. It works more like 5000-grain sandpaper, only that it removes imperfections without scratching.
To use it:
- Attach the Orange CCS Pad to your drill
- Dab a little amount of Meguiar's Ultimate Compound on the pad
- Start polishing.
Step 6: Detailing
Apply clear coat paint to protect the base coat from UV rays, water spots, scratches, and swirl marks.
For this, We Recommend VHT Caliper Paint, which is temperature resistant up to 900°F. It doesn’t crack, chip, fade, or rust, even under extreme weather conditions. In addition, it dries to the touch in 30 minutes.
Nevertheless, We recommend letting it dry overnight for best results.
Step 7: Polish Again
Polish again using your drill, Meguiar’s Ultimate Compound, and the Orange CCS Pad.
Conclusion
We hope this article has helped you learn how to paint a compound bow at home. It’s pretty straightforward, which is why we think it’s such a great option for people afraid of getting into the nitty-gritty details.
Even at that, ensure to observe aftercare tips. Once a month, clean your bow thoroughly with rubbing alcohol. Finally, once every six months, take your bow in for professional cleaning and waxing. A reputable archery shop should be able to do all of these things for you, depending on where you live.
After Painting, Read The Following Articles To Get The Rest Things Done

