Archery is one of those sports that need an amazingly focused mind, dedication, and hard work. Otherwise, you will keep missing your target, and that’s going to be frustrating.
But to get better at shooting targets, you can use sights for your recurve bow. This way, you can enhance your skill, and your practice session will be more fruitful.
Now you may ask how to use recurve bow sights? Well, we were prepared for this part!
Here we’ll guide you through the whole process in detail so you can easily sight in your bow hit the bull’s eye.
So without wasting much time, let’s get into that part.
Table of Contents
Things To Do Before You Sight In Your Recurve Bow – Essential Steps
Before you learn how to use a sight on a recurve bow, you need to know about some basic things that will help you along the. Well, you cannot just buy a sight and start using that right away.
So let’s talk about the preparations at first, and then we’ll discuss the other things. Here is a list of tasks you need to perform before shooting arrows with your recurve bows.
Take a Few Days off for This Task
If you are new, you can’t finish sighting in just one day. You will get tired, and your accuracy will be hampered, and you don’t want that. Therefore, take a few days to do the sighting properly; it’s not going anywhere.
Purchase Your Sight
When you are clearing your schedule, you can purchase your sight. And while doing that, you will get three options; Open Ring Sights, Pin Sights, and Target Sights.
- Open Ring Sights: Open ring sights come with simple construction and are available within a pocket-friendly budget. When you install it, your arrows will be lining up with the center of the ring, which will help you to pinpoint your target.
- Pin Sights: Archers love to use pin sights for their target practice, and it is the most popular one in this sport. And there are two types of this sight, single-pin, and multiple-pin sight. Single-pin sights are amazingly helpful for beginners, and multiple pins are more of an expert’s choice. But it would help if you switched to multiple-pin sight as soon as possible as it allows you to have more options when it comes to shooting.
- Target Sights: Target sights are made for recurve bows and come with an expensive price tag. But these sights are highly advanced and designed with features such as windage and retina technology. So when you can’t afford to miss a target, you should start using this one ASAP!
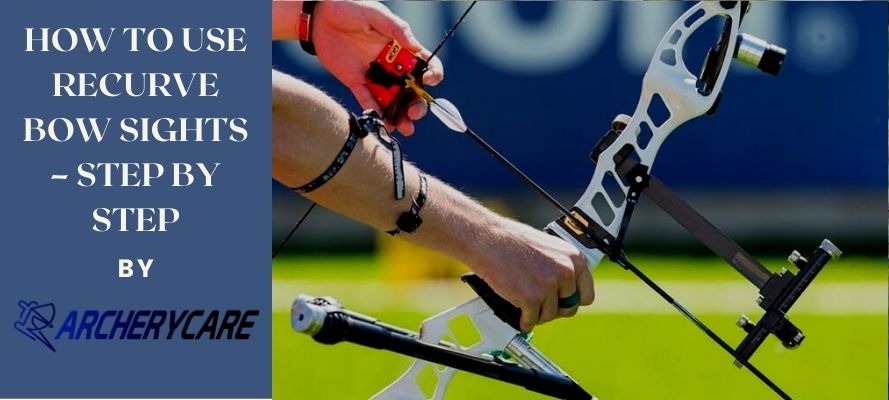
Install the Sight on Your Bow
Now that you’ve bought the sight, you have to mount it on your bow. Most bows come with pre-drilled holes, so there will be no difficulty using them. And always follow the instruction which was included in the sight’s packaging.
When you are done installing, let it rest overnight and check it in the morning to see if it needs any adjustment or not.

See Also: How To Mount A Sight On A Recurve Bow
6 Steps To Use Recurve Bow Sights
It’s time to tell you how to sight in a recurve bow to shoot right on the spot. However, we will be discussing the pin sights here as they are the most popular ones.
Step One – Set the Sighting Pin Adjustment
Before sighting in, you need to set all the sighting pins to the middle point. This way, you will get enough room in any direction you want. For this step, you need an Allan wrench to make the adjustments.
Step Two – Set Up Your Target and Mark Ranges
First of all, set up your target on the ground and then mark your ranges off in every 10 yards. You should mark off ranges up to 40 yards for an optimal experience.
If you feel this step is too complicated for you, get a range finder to achieve perfect accuracy.
Step Three – Sight-in Your Bow
Finally, you can start sighting in your bow. And here are the correct orders for doing it properly.
- Firstly, you need to set your 20-yard Pin, the first one. Now, go to the closest distance, around the 10-yard mark.
- Secondly, stand in the way, so your body seems at a 90-degree angle to the target, and then draw an arrow back using your bow.
- Thirdly, you need to look down the sight at the top Pin. After that, start shooting your arrows at the target. And keep repeating it.
Step Four – Set Your 30-yard Pin
After doing your 20-yard estimate, now it is time for the 30-yard Pin. Go to your 30-yard mark on the range, and using your second Pin, aim down the side. Shot some arrows in this way with the same adjustment you made in your 20-yard mark.
While doing this step, take all the time you need to make the 30-yard Pin super accurate. It will be the anchor of your sight, and this won’t be changing. So be careful when you are doing it.
Step Five – Go Back to 40-Yard Pin
During this step, you have to shoot arrows at the target. And you need to keep looking at the 40-yard Pin with the sight.
While making adjustments at this stage, you have to move the Pin instead of the sight box. You won’t have to move left or right with the sight box for shooting the target. Just focus on making the 40-yard arrow hit the pinpoint.
Step Six – Check Your 20-Yard Shot Again
After doing the 30 and 40-yard adjustments, check your 20-yard settings by shooting arrows. And then make any adjustment needed by moving the Pin, not the entire sight box.
Well, this was everything on how to use a recurve bow sight!
The Bottom Line
For any beginner, adjusting the recurve bow sight can be a little daunting. Sometimes even the experienced ones feel a bit confused while following all the directions.
But hopefully, after going through our guide on how to use recurve bow sights, you can complete the task pretty effortlessly. All you have to be is focused and keep patience, and the whole process will be done pretty smoothly.
Related Posts You May Read: