If you are into archery, adjusting the bow brace height is a part of the process. As a beginner, the procedure may feel a little complicated, but a passionate archer will grasp all the knowledge in no time!
But the question is, what is the accurate recurve bow brace height? Is there any rock-solid measurement, or do you have the liberty to fix it by yourself? Well, that’s what we will discuss here today.
Here we will give you the ideal recurve bow brace height chart and tell you how to do the adjustment perfectly.
So without any further ado, let’s get enlightened!
Table of Contents
What is the Brace Height and Why It Requires Adjustments?
Before seeing the chart and learning the method, we need to know what is brace height on a recurve bow? Don’t worry; We will keep the answer simple!
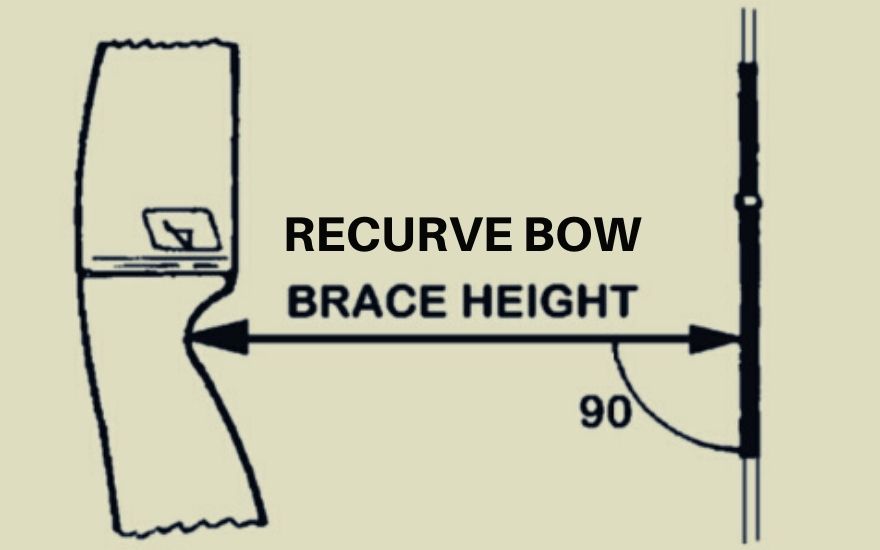
So the brace height is the space between the string in the loose position and the deepest part of the riser of your recurve bow. Some bows come with a brace height of 7.5-9.5 inches which is a standard measurement. However, it may vary from bow to bow, which is quite natural.
When it’s about shooting arrows, this brace height controls some pretty important aspects of the weapon. For instance, it will determine the speed of your shot. Well, that’s a crucial thing of archery, so you need to maintain the accurate brace height all the time.
Moreover, without the perfect height adjustment, you’ll never be able to hit the bull’s eye! And you don’t want that when you are in the middle of your practice or a hunt!
Therefore, if you are looking for smooth performance and want accurately fired shots, you will need to modify the height optimally. Otherwise, your efforts will go in vain.

Recurve Bow Brace Height Chart – The Ideal Measurement
Before doing the alterations, it is important to know about the accurate brace heights of your recurve bow. So here we are giving a chart so you can easily determine which measurement will be the most accurate one for your bow.
Bow Length (AMO) | Brace Height |
|---|---|
54 Inches | 7 inches |
56 Inches | 7.25 inches |
58 Inches | 7.25 to 7.75 inches |
60 Inches | 7.5 to 8.25 inches |
62 Inches | 7.75- to 8.5 inches |
64 Inches | 8 to 8.75 inches |
66 Inches | 8.25 to 9 inches |
68 Inches | 8.5 to 9.25 inches |
70 Inches | 8.25 to 9.5 inches |
72 Inches | 9.5 to 9.75 inches |
However, sometimes the suggested brace height by the manufacturer or the one we just mentioned may not work for you. In that case, you can always alter it according to your preference.
There’s no ironclad measurement follow. Hence, you need to discover what works the best for you. Yes, you may need to go through trial and error, but that’s just part of the journey!
How To Adjust Recurve Bow Brace Height – Step by Step
Adjusting your recurve bow is something you need to do on a regular basis. Yes, every time you pick up your bow, you have to do some alterations to make perfect shots.
At first, the whole procedure may seem a bit tricky. But after a while, it will become a part of your life, like scrolling your Instagram feed all day long! So here is the step-by-step instruction for you. Don’t worry; the whole thing is pretty straightforward!
- Bow Square
Step One – Measure your Bow Height
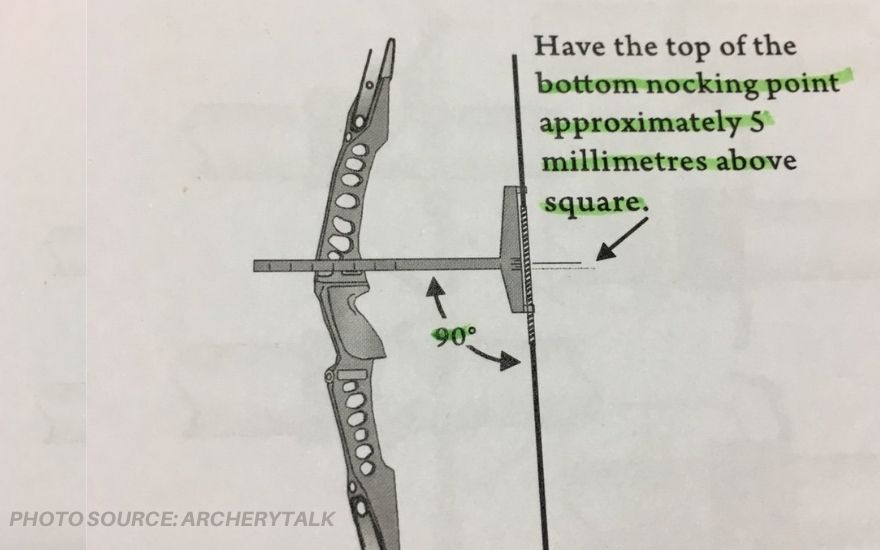
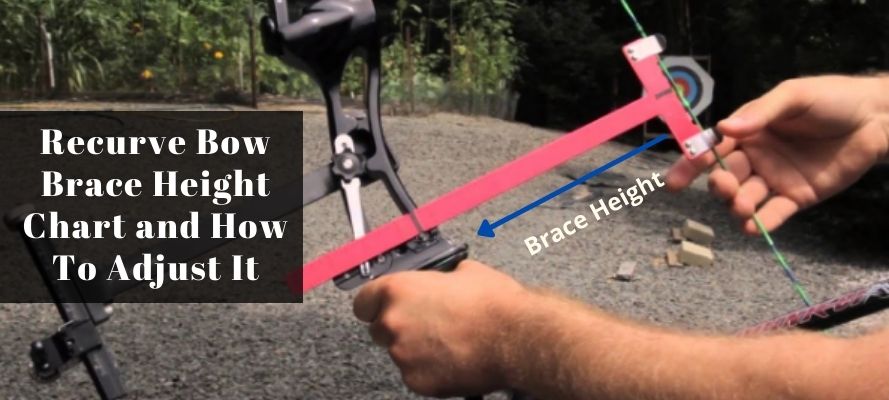
First of all, take your bow square and put it in the deepest part of your bow’s grip. You have to do this to check out the measurement of the bowstring. You can follow the chart given above for a better understanding.
These are the optimal brace heights of the most recurve bows. If you get one of these measurements after calculating with your bow square, you’re good to go.
Step Two – Remove the Bowstring
If the measurement wasn’t ideal, you need to remove the bowstring to perform the adjustments. To do this, first, you have to unstring the bows. After that, get rid of the bottom string loop. And then, you can easily alter the height.
Final Step – Do the Height Adjustment
If the brace height is lower than your desired measurement, you can twist it twice to increase it up to ¼ inch. And when it is too high, loosen up some twists to reduce the height.
After doing the adjustments, you need to install your bowstring again to check if you’ve done everything correctly. If not, follow the procedure again to reach your goal.

The Bottom Line
So here is your recurve bow brace height chart and instruction on how you can do the adjustments effortlessly. Well, the procedure is pretty simple; hence, you can master it in a flash!
And if the suggested chart isn’t ideal for you, try to figure out the height that works the best for you. After a few attempts, you will become an expert; there’s no doubt about that!
Read Related Recurve Bow Guides:

