How to Paint a Compound Bow Without Wrecking It
What to mask, which paint survives a bow's flex and solvents, and the two things that will void your warranty or ruin your tune.
By the Archery Care Editorial Team
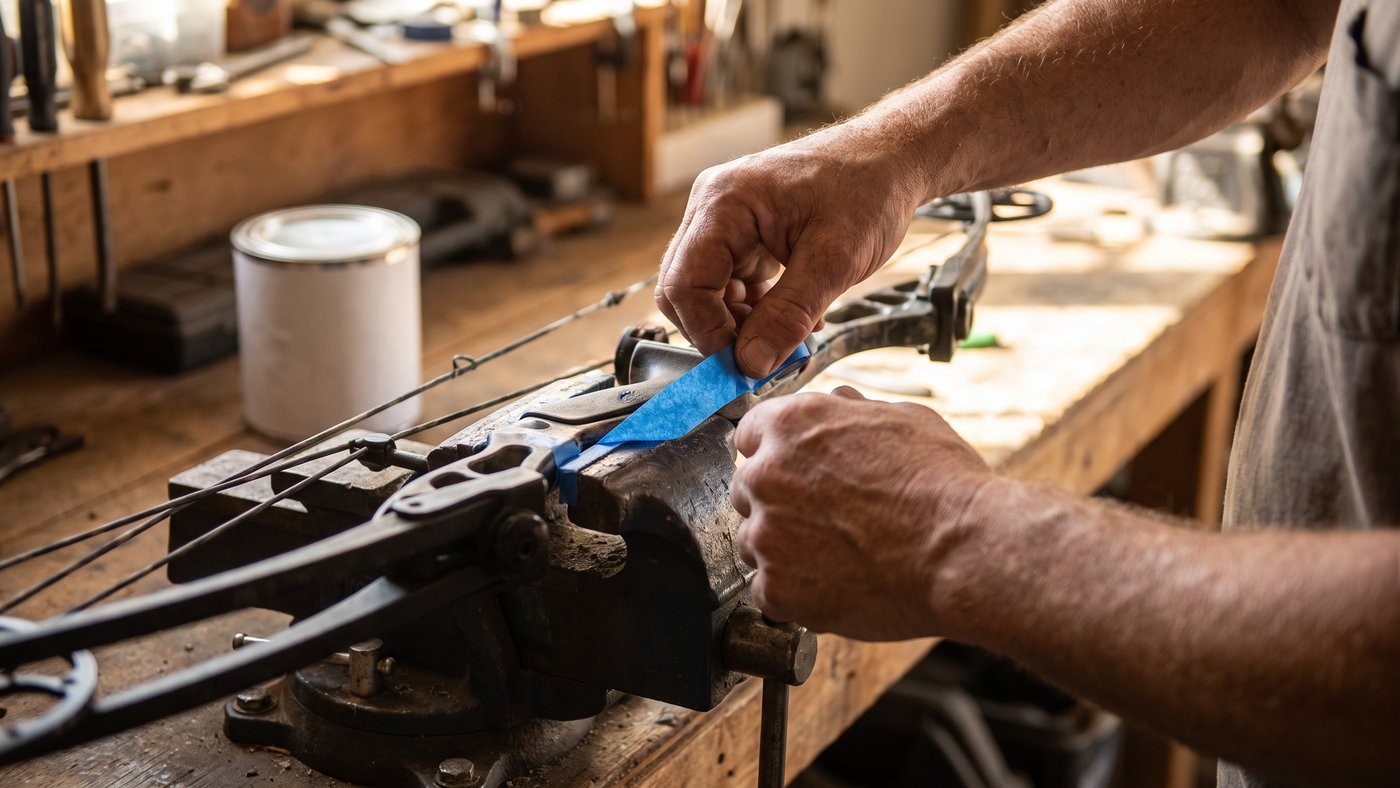
Painting a bow is mostly masking. The spraying takes twenty minutes; the prep takes an afternoon, and that ratio is what separates a finish that lasts a season from one that peels off the riser in flakes.
Before anything: check your warranty. Several manufacturers treat a refinished riser as a modification, and a cracked riser you painted is a conversation you'll lose.
- 1
Strip the bow down
Take off the sight, rest, quiver, stabiliser and wrist sling. If you're comfortable and have a press, pull the limbs and cams so you're painting a bare riser — that's the clean way.
If you're not pressing it, you're painting around the string, cables and cams, and your masking has to be perfect.
- 2
Mask what must never get paint
Paint on any of these causes real problems, not cosmetic ones:
- String and cables — paint stiffens strands and destroys them. Wrap them completely.
- Cams, axles and bearings — dried overspray in a bearing is a tuning problem you'll chase for weeks.
- Limb pockets and the limb/riser contact faces — paint thickness there changes limb seating and therefore your timing.
- The arrow shelf and rest mounting face — a paint layer shifts centreshot.
- Threaded holes — plug them with toothpicks or bolts; filled threads mean a cross-threaded sight later.
- Grip, if you want it to stay the same thickness in your hand.
- 3
Degrease, then scuff
Wipe everything with acetone or denatured alcohol to strip factory oils, bow wax and skin oil. This is the step people skip and it's the reason paint peels.
Scuff the anodised or powder-coated surface with a grey Scotch-Brite pad or 320-grit until the sheen is gone and it's uniformly dull. You're giving the primer teeth, not removing the finish. Wipe again after scuffing — the dust will ruin the coat.
- 4
Pick paint that survives a bow
A bow flexes, gets hauled through brush, and meets bug spray, solvents and sweat. Craft-store spray paint fails on all four.
- Cerakote — the toughest and most chemical-resistant, but it's an oven-cured ceramic; most people send the riser to a shop.
- DuraCoat — air-cured, DIY-friendly, genuinely durable. The usual sweet spot.
- Krylon Fusion / Rust-Oleum for plastic — cheap and easy, and it will show wear inside a season. Fine for a beater bow.
- Hydro-dipping — best for camo patterns; almost always a service, not a driveway job.
- 5
Spray thin, cure fully
Several light coats beat one heavy one, every time. Heavy coats run, and thick paint at any contact surface changes fit. Give each coat the full flash time on the can.
Then leave it alone. Air-cured finishes are dry to the touch in an hour and fully hard in days — reassemble too early and you'll press fingerprints into it. Rushing cure time is the second most common way this goes wrong, right after skipping the degrease.
- 6
The alternative nobody mentions
If you want the look without the risk, a bow wrap or limb skin is vinyl, goes on in an evening, peels off when you're bored, and doesn't touch your warranty or your tune. For a lot of people that's the honest answer — the paint job is only worth it if you want it permanent.